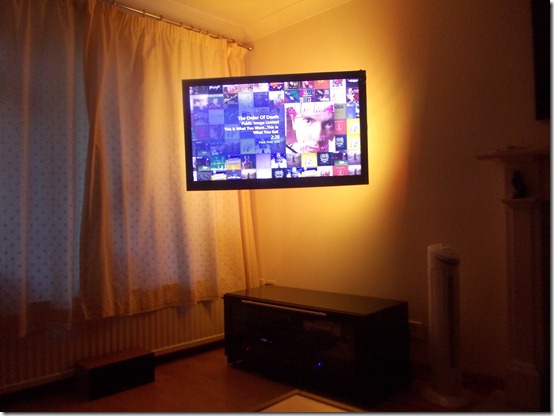
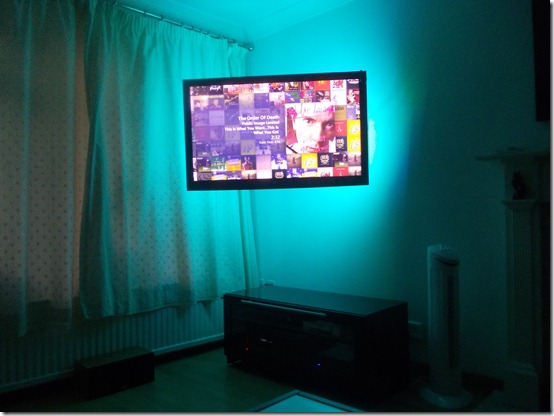
Recently I setup a Fibaro RGBW module with the existing LED strip lights behind my wall mounted TV in the living room. The Fibaro RGBW module is a wireless Z-Wave LED controller and works with Home Automation controllers such a Micasaverde Vera, Fibaro Home Center 2, Zipabox, Homeseer, Indigo, Domoticz, SmartThings.
“The Fibaro Z-Wave RGBW Controller enables you to bring multi-colour LEDs to life, allowing you to have just the right light effect for your mood.
The Fibaro RGBW Controller is a unique, advanced wireless 4-colour LED strips controller. As well as supporting the traditional RGB channels, it also supports the additional white light channel – allowing an infinite variety of pastel colours. The controller also provides dimming control of four LED channels and can take input from up to four analog sensors.”

Wiring was simple, the user manual can be found here.
I just used a small LED driver power supply behind the TV and connected a plug wire on to it, this then plugged in to the double mains socket behind the TV and the 12 volt +/- output from the power supply connects to the 12v / GND on the Fibaro RGBW module.
The 12v wire from the LED strip tape then also goes to the 12v on the Fibaro module and the colour channels go:
- Red –> Red
- Green –> Green
- Blue –> Blue
- White –> White
I am not actually using LED tape with a white channel so this remained unused. I am using bog standard RGB SMD 5050 300 LEDs Waterproof Strip, easily found on eBay, Amazon and Aliexpress etc.
Read my previous article about how I made up the LED loom for behind my wall mounted TV here.

Once the wiring was completed it was time to pair the new Fibaro RGBW module in to the Vera home automation controller. I am using a Vera Edge UI7 unit and below are the step by step instructions from Vera support on how you should pair the module.
In order to include your device on Vera , please try to follow the standard steps below:
– Bring your device within 3 feet from your Vera Controller.
– Afterwards access your Vera Web Interface ( Dashboard ), click on Devices > Add Device > Other Device > Other ZWave device, click on the step 3 ( in the right side of the page ) then click on Retry button.
-Your unit will be into exclusion mode, in the status bar you should see the this message: “Add/Remove : Remove devices now…”, after then follow the steps on your device for exclusion process according the owner guide.
-Then automatically the status bar should be: “Add/Remove : Add new devices now…” if not so, click on “Try adding it again” to put your unit into inclusion mode, the status bar should be changed into: “Add/Remove : Add new devices now…” and then follow the steps on your device for inclusion process according the owner guide.
Then give a name to your device and click on the Finish button.
Where they say “follow the steps on your device for inclusion process according the owner guide” you just press the B button on the Fibaro RGBW module quickly 3 times.
The new device(s) are then added in to the Vera controller web GUI and you end up with 6 new devices. Unfortunately I forgot to take some screen shots of the devices before I renamed them and moved them in to the lounge room, but basically you get the main parent device a child device which is used as a dim all channels function and then a device for each of the colour channels RGBW.
You now need to rename these devices so they make more sense, to do this I moved all the dimmer sliders down from 100% to 0% then one by one on the child devices that are for the colour channels, move the slider up to 100% and watched the LED lights to see what colour they went? If Red for example rename that device “RGBW – Red Channel” or if the lights went Green, name it “RGBW – Green Channel” etc.
This is how the renamed devices look like in Vera UI7 on my system. RGBW Dimmer is the child device of the parent device and is the dim all functionality.
I named the parent device RGB Controlller.
Tip:-
Decide if you want to actually hide the individual colour channel child devices from the Vera web GUI? I haven’t done this yet, but I will probably hide all of the individual colour channel child devices and just keep the main parent device for the Fibaro RGBW Controller, the child device for the Dim all functionality and the device for the RGB Controller Plug-in, more on that later.
Startup Lua example:
luup.attr_set(“invisible”,”1″,134) 134 is the device ID you want to hide etc.
End of Tip
Now by default its seems that you won’t see that colour picker box in the screen shot above and it will be missing. This is a newish native feature of Vera UI7 and it needs to be enabled by making a few changes to the main parent device.
Click on the arrow of the parent device and go to Advanced.
In the device_file field and in the device_json field which can be found further down the page you need to replace the following text:
In the device_flle field change –
D_DimmableLight1.xml to D_DimmableRGBLight2.xml
In the device_json field change –
D_DimmableLight1.json to D_DimmableRGBLight2.json
So those fields should now look like this:
Then go to the Commands tab and press the Configure node right now button.
After this you should now have the native Vera RGB support and be able to see the colour picker box on the parent device. Pick a colour and then click the Choose button and the LEDs should change to that colour you just selected.
You can also use this colour picker box in scenes, so you could have a scene run and select a particular colour to then be displayed.
Congratulations you have now setup the native Vera RGB support for your Fibaro RGBW module, however there is more, as always 3rd party developers seem to do things better and there is a plug-in for Vera called “RGB Controller” by installing this plug-in we can gain even more functionality such as a colour wheel picker and support for the Fibaro RGBW modules inbuilt aimations / programs more on that later.
In the Vera UI7 web GUI go to APPS –> INSTALL APPS and search for “RGB Controller”
Now I already have the plug-in installed but you would select to install the plug-in from this area etc.
Once the plug-in has been installed you should see a new device called “RGB Controller” I believe it was called. I renamed this plug-in device to “RGBW – Colour Wheel”
Now you need to link the new RGB Controller plug-in device to the actual Fibaro RGBW Controller parent device. So you need to know what is the device ID number of the Fibaro RGBW Controller parent device? In my case its #128
Keep this number in mind and now open up the new RGB Controller plug-in device and go to the Settings tab. Under Device type select the “Fibaro RGBW Controller” and press Save.
Now for some reson the second drop down box called “Controlled Device” didn’t seem to work for me and was empty. so instead go to the Control tab –> Advanced –> Variables and scroll down to the field called Deviceid and enter the device ID number of the parent Fibaro RGBW Controller device, in my case #128
This should then have setup and configured the RGB Controller plug-in deivce to be able to control the Fibaro RGBW Controller parent device etc.
Now this is where the fun stuff starts !
You can now go to the Colour Wheel tab and you select a colour first on the wheel / circle, then in the square box in the middle, you select a shade of that colour and the LED lights will then change to that colour.
If you are using the ImperiHome mobile app for Vera you will be pleased to know that this colour wheel functionality is then also avaiable in the app.
The Fibaro RGBW module has 5 predefined animations or programs they are called:
- Fireplace
- Storm
- Rainbow
- Aurora
- LAPD
These are animations for example the Aurora animation slowly fades through the colours and the LAPD animation looks like police lights flashing which I have now used in my burglar alarm scene.
In order to utilise these inbuilt animations, I created 5 new scenes in Vera with a single line of LUA code in each to start each of the ainmations. The deviceid you can see in the code below of 139 should be the device ID of your “RGB Controller” plug-in device what ever device ID number has been assigned to it.
RGBW – Fireplace
luup.call_action(“urn:upnp-org:serviceId:RGBController1″,”StartAnimationProgram”,{ programId=”6″ },139)
RGBW – Storm
luup.call_action(“urn:upnp-org:serviceId:RGBController1″,”StartAnimationProgram”,{ programId=”7″ },139)
RGBW – Rainbow
luup.call_action(“urn:upnp-org:serviceId:RGBController1″,”StartAnimationProgram”,{ programId=”8″ },139)
RGBW – Aurora
luup.call_action(“urn:upnp-org:serviceId:RGBController1″,”StartAnimationProgram”,{ programId=”9″ },139)
RGBW – LAPD
luup.call_action(“urn:upnp-org:serviceId:RGBController1″,”StartAnimationProgram”,{ programId=”10″ },139)
I then created a sixth scene to stop the animations.
RGBW – Animation Off
luup.call_action(“urn:upnp-org:serviceId:RGBController1″,”StartAnimationProgram”,{ programId=”0″ },139)
Here you can see my new scenes in the Vera UI7 web GUI
Here are some older photos of the LED mood lighting behind my wall mounted TV


Final notes:
In the Fibaro RGBW modules user manual there are many configuration parameters that can be set and configured. However for my working setup here I did NOT add or configure any device parameters. It seems I just didn’t need to do any of that.
The Fibaro RGBW module essensitally replaces the existing LED driver and IR remote that probably came with your LED tape. However if you are interested in also keeping the IR functionality it may be possible as demonstrated on this German blog here.

Summary
I am very pleased with the Fibaro RGBW module and it has made a welcome addition to my home automation setup. Being able to control the LED mood lighting via your home automation system is much more convenient as I can now control the LED lights with our smart phones and tablets, also we can now incorporate LED lighting controls in to our home automation scenes and schedules.
Contact us today for a consultancy to see how we can make your digital smart home become a reality.


