In part one here I wrote about a little Audio Visual install project I am currently doing at my own house in England. I am further on into the project than these new pictures suggest, but I’ll do a series of posts showing this project from start to finish, the final finish could be a few weeks away yet.
I am on a pretty tight budget so I have made some purchase decisions that reflect this, but hey that’s life. However most of the components needed I have purchased at trade prices which certainly helps, although some items were purchased via eBay like my HDTV wall mount brackets as they were the cheapest out there.
These pictures where taken on my iPod touch so you will have to excuse the pretty poor picture quality on some of them.
Ideally I would have wanted a small comms cabinet but there’s that budget thing again to think about, so I opted for a simple 1U wall mount bracket, these are manufactured by StarTech. I bought a 24 port patch panel off eBay, more than I will need in this house. I so far have 14 network cables terminated in to the back of it, I may add another 4 or so, two in the kitchen and another 2 ports behind my lazy boy chair in the lounge for when I am sick of the WIFI being crap and I can just use a LAN cable with the laptop.
1U Wall Bracket plus Patch Panel – Cupboard under the stairs.
To route the cables from this cupboard to the location in the living room where the Network wall plates are, I used a cable fish tape like this one to pull the cables under the floor space. Totally invaluable tool and I used this for most of the cable installations under the floors and through walls.
Living Room – Plastered
I was going to get my brother to do the plastering he’s pretty handy but not a professional plasterer. However as I was putting in new ceiling speakers upstairs I decided to have all the ceilings upstairs plastered smooth, so called in an expert and had him fill in the walls as well.
For the channel in the wall for the AV cables I used 100mm x 25mm trunking. I thought this would be plenty wide enough to be able to fish in cables at a later date. The new electric socket for behind the TV was just a spur from the socket below and I used capping in the wall to protect the mains cable.
The metal back boxes for the AV wall plates are 35mm deep, I did initially buy 47mm deep ones but these were far too deep for my block walls. The electrical socket back boxes are just a standard 25mm deep.
In this photo you can see the network and speakers cables going down under the floor space, the network cables all obviously go back to the patch panel and the speaker cables go to 5.1 positions in the living room.
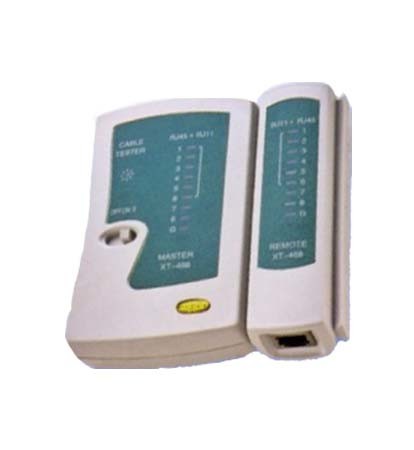
Its very important to label up each end of each cable so you know which cable is which when numbering your network points up. I also bought a cheap network cable tester off eBay like this one, this was useful as it did detect a few pins on some cables I had either wired up incorrectly or not fully punched down into the patch panel / network wall plates.
On the picture below, I’ve got the wall bracket on the wall, my living room is an odd shape, I have a small porch – stud partition wall / internal door coming into it and the stairs are at the back of the living room, there’s only one place the 3 seater sofa can be positioned, so my only option is to have the TV in the corner near the bay window, so I could not have a flush to the wall type bracket, instead I’ve gone for a full motion pull out and swivel / tilt type bracket, which was about 40 pounds off eBay from a company called Intec Brackets
On this picture you can see the speaker wall plates in the living room, these have binding posts, I bought some banana plugs to easily connect the amps to them. There is 5.1 plus Sub and the other speaker socket next to it is for the speakers in the kitchen, I’ve not got a proper AVR yet but when I buy one, Zone two will connect to the kitchen speakers. The next wall plate is 4 network points.
These are the other AV wall plates in the Living room, top left is Composite video + audio, right of that is Component video RGB plus audio, bottom left is a TOSLINK optical point for digital audio directly out of the back of the TV, to the right of this is an HDMI wall plate.
On the left near the radiator you can notice an NTL cable socket. I’ve not decided yet if to go for Virgin Media cable Internet or try and get this new BT Infinity fibre optic Internet if its available in my area? I’ve routed both a coax cable from this NTL socket and a CAT5e cable from the back of the BT master phone socket into the cupboard under the stairs, so I can have either type of modem installed in there.
I’ve simply used one of those brush face plates for the AV cables exit at the top of the channel, I’ve also added two network points behind every TV. None of my HDTV’s are Internet ready or have LAN connections, so these are for future use.
The AV cables still need cutting to length and terminating with RCA connectors.
Well I think that’s about it for part 2, see you again in part 3 soon.
5 thoughts on “Stuart’s A/V install project–Part 2”
Nice follow up post, good to see things taking shape. As you say a lot of hard work but it will certainly be worth it. I really don’t like relying on Wi-Fi so that is only used for things like laptops and mobile phones. Anything else is using homeplugs to get the “wired” network distributed around the home. It works but having proper network cabling is the ideal and look forward to reading the next parts…
I like following this post. Sure there’s loads of enthusiasts that would like to kit there place out like this but lack the motivation or worry that it’s too difficult when in reality it’s just a bit of planning and some elbow grease.
I was quite surprised you didn’t put ‘everything’ under the stairs along with the patch panel, switch etc and then run a bit of ir cable around.
Good call about having a network socket behind the tele, that’s one think I forgot which will sting me if we get media center tele’s ever and I need to stream big files.
I don’t think i’ve heard anyone talk about this kind of thing on the podcast before, I think it would be useful and really useful to have you talk some people through what you have done, sure lots of people would find little tips like the cable fisher, about what kind of trunking to get or how to channel walls (without divorce) very useful.
+1 for ebay mounts, my friend spent about 3 times what you did for his mount and cables from currys, hehe.
I could have centralised the whole lot in the cupboard under the stairs, HTPC and extenders and all amps etc and just had TVs and speakers in the rooms.
But centralising means more cost. I’ve done it before when doing AV Installs when I worked for a Smart Home company in Thailand, where everything would be in an AV rack. You can get some good IR repeater kits that work over CAT5 cable. So you end up with just a magic eye in the ceiling in the room this then goes right back to the device you are controlling in the cupboard.
For me personally its easier and cheaper to have things local in each room, so in my living room there will be the HTPC and AVR. In my bedroom I’ll have an XBOX 360 extender and amp. And in the kids room another extender and a small Denon micro HI-FI.
But I see your point and if I had a bigger posher house I’d have it all centralised.
I tested my HDMI wall plates today and the Composite and Component wall plates, everything seems to be working so I must have soldered it up correctly lol.
As for channelling walls I would not recommend an axle grinder in a house with any furniture as it creates a massive amount of dust, my house was totally empty so I got away with it, you can buy / hire proper wall chasing machines I’ve not used one but I heard they are quite good and create less mess.
Its not just IR extenders you would need, you’d also need HDMI extenders / balun’s if you had your HTPC and MCE extenders centralised. The HDMI extenders run over CAT5 or CAT6 usually two cables but I think the newer ones can run on one cable. When you start getting in to this territory things start getting more expense fast hence why I opted to have equipment local in each room.
I’d recommend these IR extenders I’ve used them before:
{"id":null,"mode":"button","open_style":"in_place","currency_code":"GBP","currency_symbol":"\u00a3","currency_type":"decimal","blank_flag_url":"https:\/\/thedigitallifestyle.com\/w\/wp-content\/plugins\/tip-jar-wp\/\/assets\/images\/flags\/blank.gif","flag_sprite_url":"https:\/\/thedigitallifestyle.com\/w\/wp-content\/plugins\/tip-jar-wp\/\/assets\/images\/flags\/flags.png","default_amount":500,"top_media_type":"none","featured_image_url":false,"featured_embed":"","header_media":null,"file_download_attachment_data":null,"recurring_options_enabled":true,"recurring_options":{"never":{"selected":true,"after_output":"One time only"},"weekly":{"selected":false,"after_output":"Every week"},"monthly":{"selected":false,"after_output":"Every month"},"yearly":{"selected":false,"after_output":"Every year"}},"strings":{"current_user_email":"","current_user_name":"","link_text":"Leave a tip","complete_payment_button_error_text":"Check info and try again","payment_verb":"Pay","payment_request_label":"TheDigitalLifestyle.com","form_has_an_error":"Please check and fix the errors above","general_server_error":"Something isn't working right at the moment. Please try again.","form_title":"TheDigitalLifestyle.com","form_subtitle":null,"currency_search_text":"Country or Currency here","other_payment_option":"Other payment option","manage_payments_button_text":"Manage your payments","thank_you_message":"Thank you for being a supporter!","payment_confirmation_title":"TheDigitalLifestyle.com","receipt_title":"Your Receipt","print_receipt":"Print Receipt","email_receipt":"Email Receipt","email_receipt_sending":"Sending receipt...","email_receipt_success":"Email receipt successfully sent","email_receipt_failed":"Email receipt failed to send. Please try again.","receipt_payee":"Paid to","receipt_statement_descriptor":"This will show up on your statement as","receipt_date":"Date","receipt_transaction_id":"Transaction ID","receipt_transaction_amount":"Amount","refund_payer":"Refund from","login":"Log in to manage your payments","manage_payments":"Manage Payments","transactions_title":"Your Transactions","transaction_title":"Transaction Receipt","transaction_period":"Plan Period","arrangements_title":"Your Plans","arrangement_title":"Manage Plan","arrangement_details":"Plan Details","arrangement_id_title":"Plan ID","arrangement_payment_method_title":"Payment Method","arrangement_amount_title":"Plan Amount","arrangement_renewal_title":"Next renewal date","arrangement_action_cancel":"Cancel Plan","arrangement_action_cant_cancel":"Cancelling is currently not available.","arrangement_action_cancel_double":"Are you sure you'd like to cancel?","arrangement_cancelling":"Cancelling Plan...","arrangement_cancelled":"Plan Cancelled","arrangement_failed_to_cancel":"Failed to cancel plan","back_to_plans":"\u2190 Back to Plans","update_payment_method_verb":"Update","sca_auth_description":"Your have a pending renewal payment which requires authorization.","sca_auth_verb":"Authorize renewal payment","sca_authing_verb":"Authorizing payment","sca_authed_verb":"Payment successfully authorized!","sca_auth_failed":"Unable to authorize! Please try again.","login_button_text":"Log in","login_form_has_an_error":"Please check and fix the errors above","uppercase_search":"Search","lowercase_search":"search","uppercase_page":"Page","lowercase_page":"page","uppercase_items":"Items","lowercase_items":"items","uppercase_per":"Per","lowercase_per":"per","uppercase_of":"Of","lowercase_of":"of","back":"Back to plans","zip_code_placeholder":"Zip\/Postal Code","download_file_button_text":"Download File","input_field_instructions":{"tip_amount":{"placeholder_text":"How much would you like to tip?","initial":{"instruction_type":"normal","instruction_message":"How much would you like to tip? Choose any currency."},"empty":{"instruction_type":"error","instruction_message":"How much would you like to tip? Choose any currency."},"invalid_curency":{"instruction_type":"error","instruction_message":"Please choose a valid currency."}},"recurring":{"placeholder_text":"Recurring","initial":{"instruction_type":"normal","instruction_message":"How often would you like to give this?"},"success":{"instruction_type":"success","instruction_message":"How often would you like to give this?"},"empty":{"instruction_type":"error","instruction_message":"How often would you like to give this?"}},"name":{"placeholder_text":"Name on Credit Card","initial":{"instruction_type":"normal","instruction_message":"Enter the name on your card."},"success":{"instruction_type":"success","instruction_message":"Enter the name on your card."},"empty":{"instruction_type":"error","instruction_message":"Please enter the name on your card."}},"privacy_policy":{"terms_title":"Terms and conditions","terms_body":null,"terms_show_text":"View Terms","terms_hide_text":"Hide Terms","initial":{"instruction_type":"normal","instruction_message":"I agree to the terms."},"unchecked":{"instruction_type":"error","instruction_message":"Please agree to the terms."},"checked":{"instruction_type":"success","instruction_message":"I agree to the terms."}},"email":{"placeholder_text":"Your email address","initial":{"instruction_type":"normal","instruction_message":"Enter your email address"},"success":{"instruction_type":"success","instruction_message":"Enter your email address"},"blank":{"instruction_type":"error","instruction_message":"Enter your email address"},"not_an_email_address":{"instruction_type":"error","instruction_message":"Make sure you have entered a valid email address"}},"note_with_tip":{"placeholder_text":"Your note here...","initial":{"instruction_type":"normal","instruction_message":"Attach a note to your tip (optional)"},"empty":{"instruction_type":"normal","instruction_message":"Attach a note to your tip (optional)"},"not_empty_initial":{"instruction_type":"normal","instruction_message":"Attach a note to your tip (optional)"},"saving":{"instruction_type":"normal","instruction_message":"Saving note..."},"success":{"instruction_type":"success","instruction_message":"Note successfully saved!"},"error":{"instruction_type":"error","instruction_message":"Unable to save note note at this time. Please try again."}},"email_for_login_code":{"placeholder_text":"Your email address","initial":{"instruction_type":"normal","instruction_message":"Enter your email to log in."},"success":{"instruction_type":"success","instruction_message":"Enter your email to log in."},"blank":{"instruction_type":"error","instruction_message":"Enter your email to log in."},"empty":{"instruction_type":"error","instruction_message":"Enter your email to log in."}},"login_code":{"initial":{"instruction_type":"normal","instruction_message":"Check your email and enter the login code."},"success":{"instruction_type":"success","instruction_message":"Check your email and enter the login code."},"blank":{"instruction_type":"error","instruction_message":"Check your email and enter the login code."},"empty":{"instruction_type":"error","instruction_message":"Check your email and enter the login code."}},"stripe_all_in_one":{"initial":{"instruction_type":"normal","instruction_message":"Enter your credit card details here."},"empty":{"instruction_type":"error","instruction_message":"Enter your credit card details here."},"success":{"instruction_type":"normal","instruction_message":"Enter your credit card details here."},"invalid_number":{"instruction_type":"error","instruction_message":"The card number is not a valid credit card number."},"invalid_expiry_month":{"instruction_type":"error","instruction_message":"The card's expiration month is invalid."},"invalid_expiry_year":{"instruction_type":"error","instruction_message":"The card's expiration year is invalid."},"invalid_cvc":{"instruction_type":"error","instruction_message":"The card's security code is invalid."},"incorrect_number":{"instruction_type":"error","instruction_message":"The card number is incorrect."},"incomplete_number":{"instruction_type":"error","instruction_message":"The card number is incomplete."},"incomplete_cvc":{"instruction_type":"error","instruction_message":"The card's security code is incomplete."},"incomplete_expiry":{"instruction_type":"error","instruction_message":"The card's expiration date is incomplete."},"incomplete_zip":{"instruction_type":"error","instruction_message":"The card's zip code is incomplete."},"expired_card":{"instruction_type":"error","instruction_message":"The card has expired."},"incorrect_cvc":{"instruction_type":"error","instruction_message":"The card's security code is incorrect."},"incorrect_zip":{"instruction_type":"error","instruction_message":"The card's zip code failed validation."},"invalid_expiry_year_past":{"instruction_type":"error","instruction_message":"The card's expiration year is in the past"},"card_declined":{"instruction_type":"error","instruction_message":"The card was declined."},"missing":{"instruction_type":"error","instruction_message":"There is no card on a customer that is being charged."},"processing_error":{"instruction_type":"error","instruction_message":"An error occurred while processing the card."},"invalid_request_error":{"instruction_type":"error","instruction_message":"Unable to process this payment, please try again or use alternative method."},"invalid_sofort_country":{"instruction_type":"error","instruction_message":"The billing country is not accepted by SOFORT. Please try another country."}}}},"fetched_oembed_html":false}

.JPG?psid=1)
.JPG?psid=1)
.JPG?psid=1)

.JPG?psid=1)
.JPG?psid=1)
.JPG?psid=1)

.JPG?psid=1)
.JPG?psid=1)
.JPG?psid=1)
.JPG?psid=1)
.JPG?psid=1)
Nice follow up post, good to see things taking shape. As you say a lot of hard work but it will certainly be worth it. I really don’t like relying on Wi-Fi so that is only used for things like laptops and mobile phones. Anything else is using homeplugs to get the “wired” network distributed around the home. It works but having proper network cabling is the ideal and look forward to reading the next parts…
I like following this post. Sure there’s loads of enthusiasts that would like to kit there place out like this but lack the motivation or worry that it’s too difficult when in reality it’s just a bit of planning and some elbow grease.
I was quite surprised you didn’t put ‘everything’ under the stairs along with the patch panel, switch etc and then run a bit of ir cable around.
Good call about having a network socket behind the tele, that’s one think I forgot which will sting me if we get media center tele’s ever and I need to stream big files.
I don’t think i’ve heard anyone talk about this kind of thing on the podcast before, I think it would be useful and really useful to have you talk some people through what you have done, sure lots of people would find little tips like the cable fisher, about what kind of trunking to get or how to channel walls (without divorce) very useful.
+1 for ebay mounts, my friend spent about 3 times what you did for his mount and cables from currys, hehe.
Look forward to part 3.
Cheers
Hi Tom
I could have centralised the whole lot in the cupboard under the stairs, HTPC and extenders and all amps etc and just had TVs and speakers in the rooms.
But centralising means more cost. I’ve done it before when doing AV Installs when I worked for a Smart Home company in Thailand, where everything would be in an AV rack. You can get some good IR repeater kits that work over CAT5 cable. So you end up with just a magic eye in the ceiling in the room this then goes right back to the device you are controlling in the cupboard.
For me personally its easier and cheaper to have things local in each room, so in my living room there will be the HTPC and AVR. In my bedroom I’ll have an XBOX 360 extender and amp. And in the kids room another extender and a small Denon micro HI-FI.
But I see your point and if I had a bigger posher house I’d have it all centralised.
I tested my HDMI wall plates today and the Composite and Component wall plates, everything seems to be working so I must have soldered it up correctly lol.
As for channelling walls I would not recommend an axle grinder in a house with any furniture as it creates a massive amount of dust, my house was totally empty so I got away with it, you can buy / hire proper wall chasing machines I’ve not used one but I heard they are quite good and create less mess.
More soon.
เก่งจังเลย.
hehe small world, I used to live in thailand as well, miss it bitterly.
I know keane sell decent ir repeaters, at least the ones I used to go from a cupboard to 9 metres away worked well. Cat ones sound great.
i’ll check out part 3 now, sawatdee.
Its not just IR extenders you would need, you’d also need HDMI extenders / balun’s if you had your HTPC and MCE extenders centralised. The HDMI extenders run over CAT5 or CAT6 usually two cables but I think the newer ones can run on one cable. When you start getting in to this territory things start getting more expense fast hence why I opted to have equipment local in each room.
I’d recommend these IR extenders I’ve used them before:
http://experts.windows.com/frms/windows_entertainment_and_connected_home/f/116/p/92609/505771.aspx#505771
As for HDMI extenders I’m not sure the ones I used were hit and miss and I never found one that was 100% solid.